Lights
Centric Software
—
2022
I designed an editing tool that gave teams and individuals control over the lighting for 3D models, reducing dependency on 3D designers, streamlining daily tasks and improving overall productivity.
click around
Ambient Light
Directional Light 1
Directional Light 2
Display light controls on Canvas
Intensity
Temperature


Lighting
Lights
Environments
Save as New
Save Changes
Standard
Sunset
Midnight Blue
Winter 2023
Fall 2022
Project overview
01
Problem
Enabling users to customize lighting within Centric's 3D viewer was essential for enhancing productivity. Users experienced workflow disruptions due to long turnaround time on ' Environments*' requests and the inability to directly edit light properties. Our team addressed how to provide users with control over lighting for 3D models.
*Environments is a feature within the 3D viewer that allows teams to visualize 3D models in real-world lighting setup. Eg: Studio lighting, Museum lighting, etc.
Solution
The 'Lights' module is a simple, powerful feature that allows users to control and customize 3D model lighting, encouraging creativity without adding complexity.
Impact
A 33% experiment adoption rate that led to feature’s integration into the 3D viewer.
40% decrease in 'environment' request tickets, effectively eliminating bottlenecks and enhancing productivity.
Tools


As the UX Designer on the 3D team, I led the end-to-end design process of the 'Lights' module. I worked closely with a Product Manager and an Engineering Lead to understand technical constraints and prioritize features. Additionally, I collaborated with other designers in the company for design reviews and feedback sessions.


Context
02
Centric helps brands take their products from idea to market.
Research
Planning
Design
Q/A
Production
The platform provides tools for all managing all phases of a product lifecycle, connecting all the stakeholders involved in the value chain.
The 3D viewer is one such tool that allows users to collaborate on product designs at various stages.

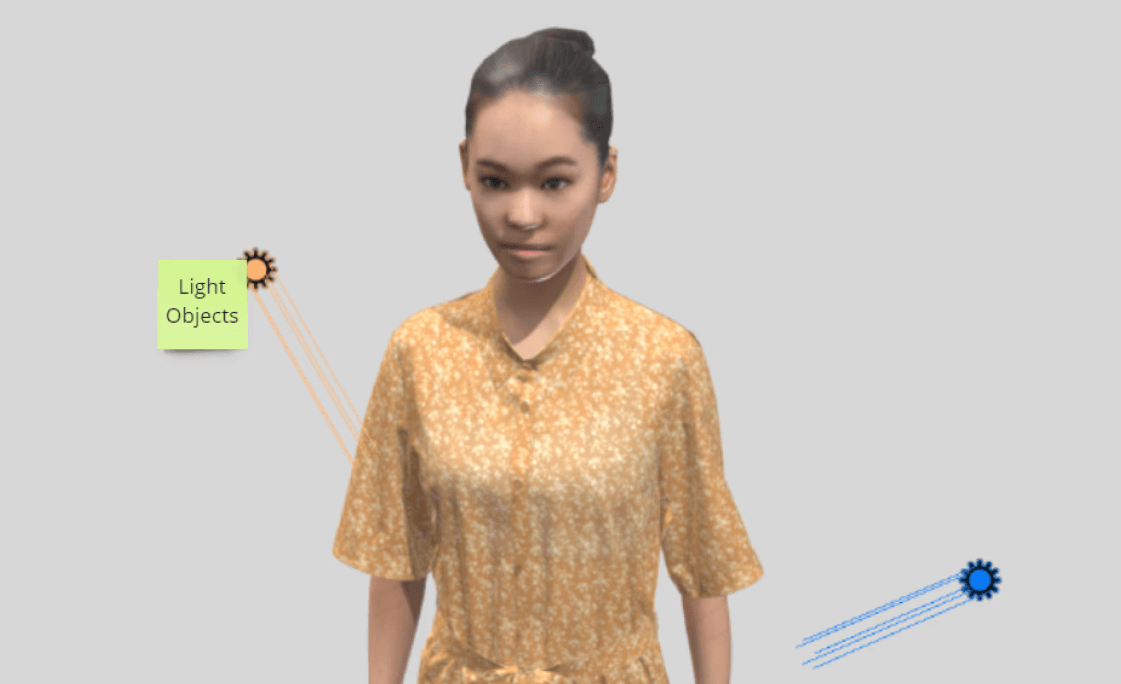
Environments in 3D viewer allows users to view 3D models in realistic lighting setups.
Environments are collections of light objects such as spotlights, ambient light, and directional lights. These lights are placed and oriented in specific ways to simulate real-world lighting situations, like studio lighting, outdoors, and more.

Problem
03
Environments are created on external tools by 3D designers and then uploaded to the Centric platform. This means that light properties cannot be changed from within the Centric platform.
So everyone would reach out to the designer whenever they needed an environment.
Research
Planning
Designer
Q/A
Production
Sales
Marketing
PMs
Problem
As the number of requests for new environments kept piling up, the designers couldn't keep up with the demand. This dependency led to delays and bottlenecks in every day tasks, creating the need for an efficient solution to save time and resources.
Discovery phase
04
Studying environment tickets and user research data, I realized that most requests involved small changes to existing environments, and waiting for these adjustments often brought their daily tasks to a halt.
Many of these small changes were needed for tasks like product presentations, visual adjustments for client reviews, and fine-tuning design details, which were all critical for meeting tight deadlines and maintaining workflow efficiency.
Research details
Insight
The insights uncovered the need for adding a new layer of customization, beyond the existing environments' offering.
To summarize
My users are predominantly from non-tech backgrounds,
and they want flexibility and control over light settings,
so they can make quick and easy adjustments.
Problem statement
05
How might we equip the 3D viewer with lighting controls that encourages exploration and and creativity?
Competitive research
06
Testing the benchmarked tools revealed that users preferred simple interfaces with real-time feedback, emphasizing a low learning curve and diverse interaction options.
Collaborating with the Business Consultants, who work closely with clients and test features before rollout, I identified key practices and patterns. This ensured the product was specifically tailored to my users' needs.

Industry benchmarking and testing details
Design, Tech, and Business
07
Partnering with PM and Engineering teams, we prioritized features by assessing technical feasibility, repurposing existing design patterns, and identifying high-impact functionalities.
Feature prioritization details
Design and iterations
08
I created an editing tool that gave teams and individuals control over the lighting for 3D models, reducing dependency on 3D designers, streamlining daily tasks and overall productivity.

Lights module
—
1
One of the initial questions was: Where should the 'Lights' module exist within the 3D viewer to ensure optimal user accessibility and functionality?

Cannot exist within 'Environments' as they are made externally and their properties cannot be changed from within the Centric 3D viewer.

'Lights' module had to be designed to sit outside the Environments mode.
'Lights' and 'Environments' are mutually exclusive. How do we communicate this to the users?
When designing for mutually exclusive groups, I had to consider three key aspects:
Communication: The design should clearly communicate that only one mode can be turned on at a time.
Adaptable: The design needed to accommodate future scenarios where multiple modes could be turned on simultaneously.
Scalable: It was important to ensure that the design is scalable for future modes such as softness and shadows.
Tab switch group
Radio button
Toggle

Communicative
Adaptable
Scalable

Communicative
Adaptable
Scalable

Communicative
Adaptable
Scalable
Selected
Although the toggle switch was effective, it still did not clearly solve the problem of communicating to the users that the modes are mutually exclusive. There was still a risk of users losing their changes if they are not fully aware and informed.
Information message
Modal pop-up

Communicative
Unobtrusive
Error prevention

Communicative
Actionable
Error prevention
Selected
User testing revealed that the modal box was preferred. They found it more informative and the action-oriented buttons helped prevent errors.

I also took user feedback on what the buttons should say within the modal box to make it as intuitive as possible.

User flow — Switching modes

Positioning controls
—
2
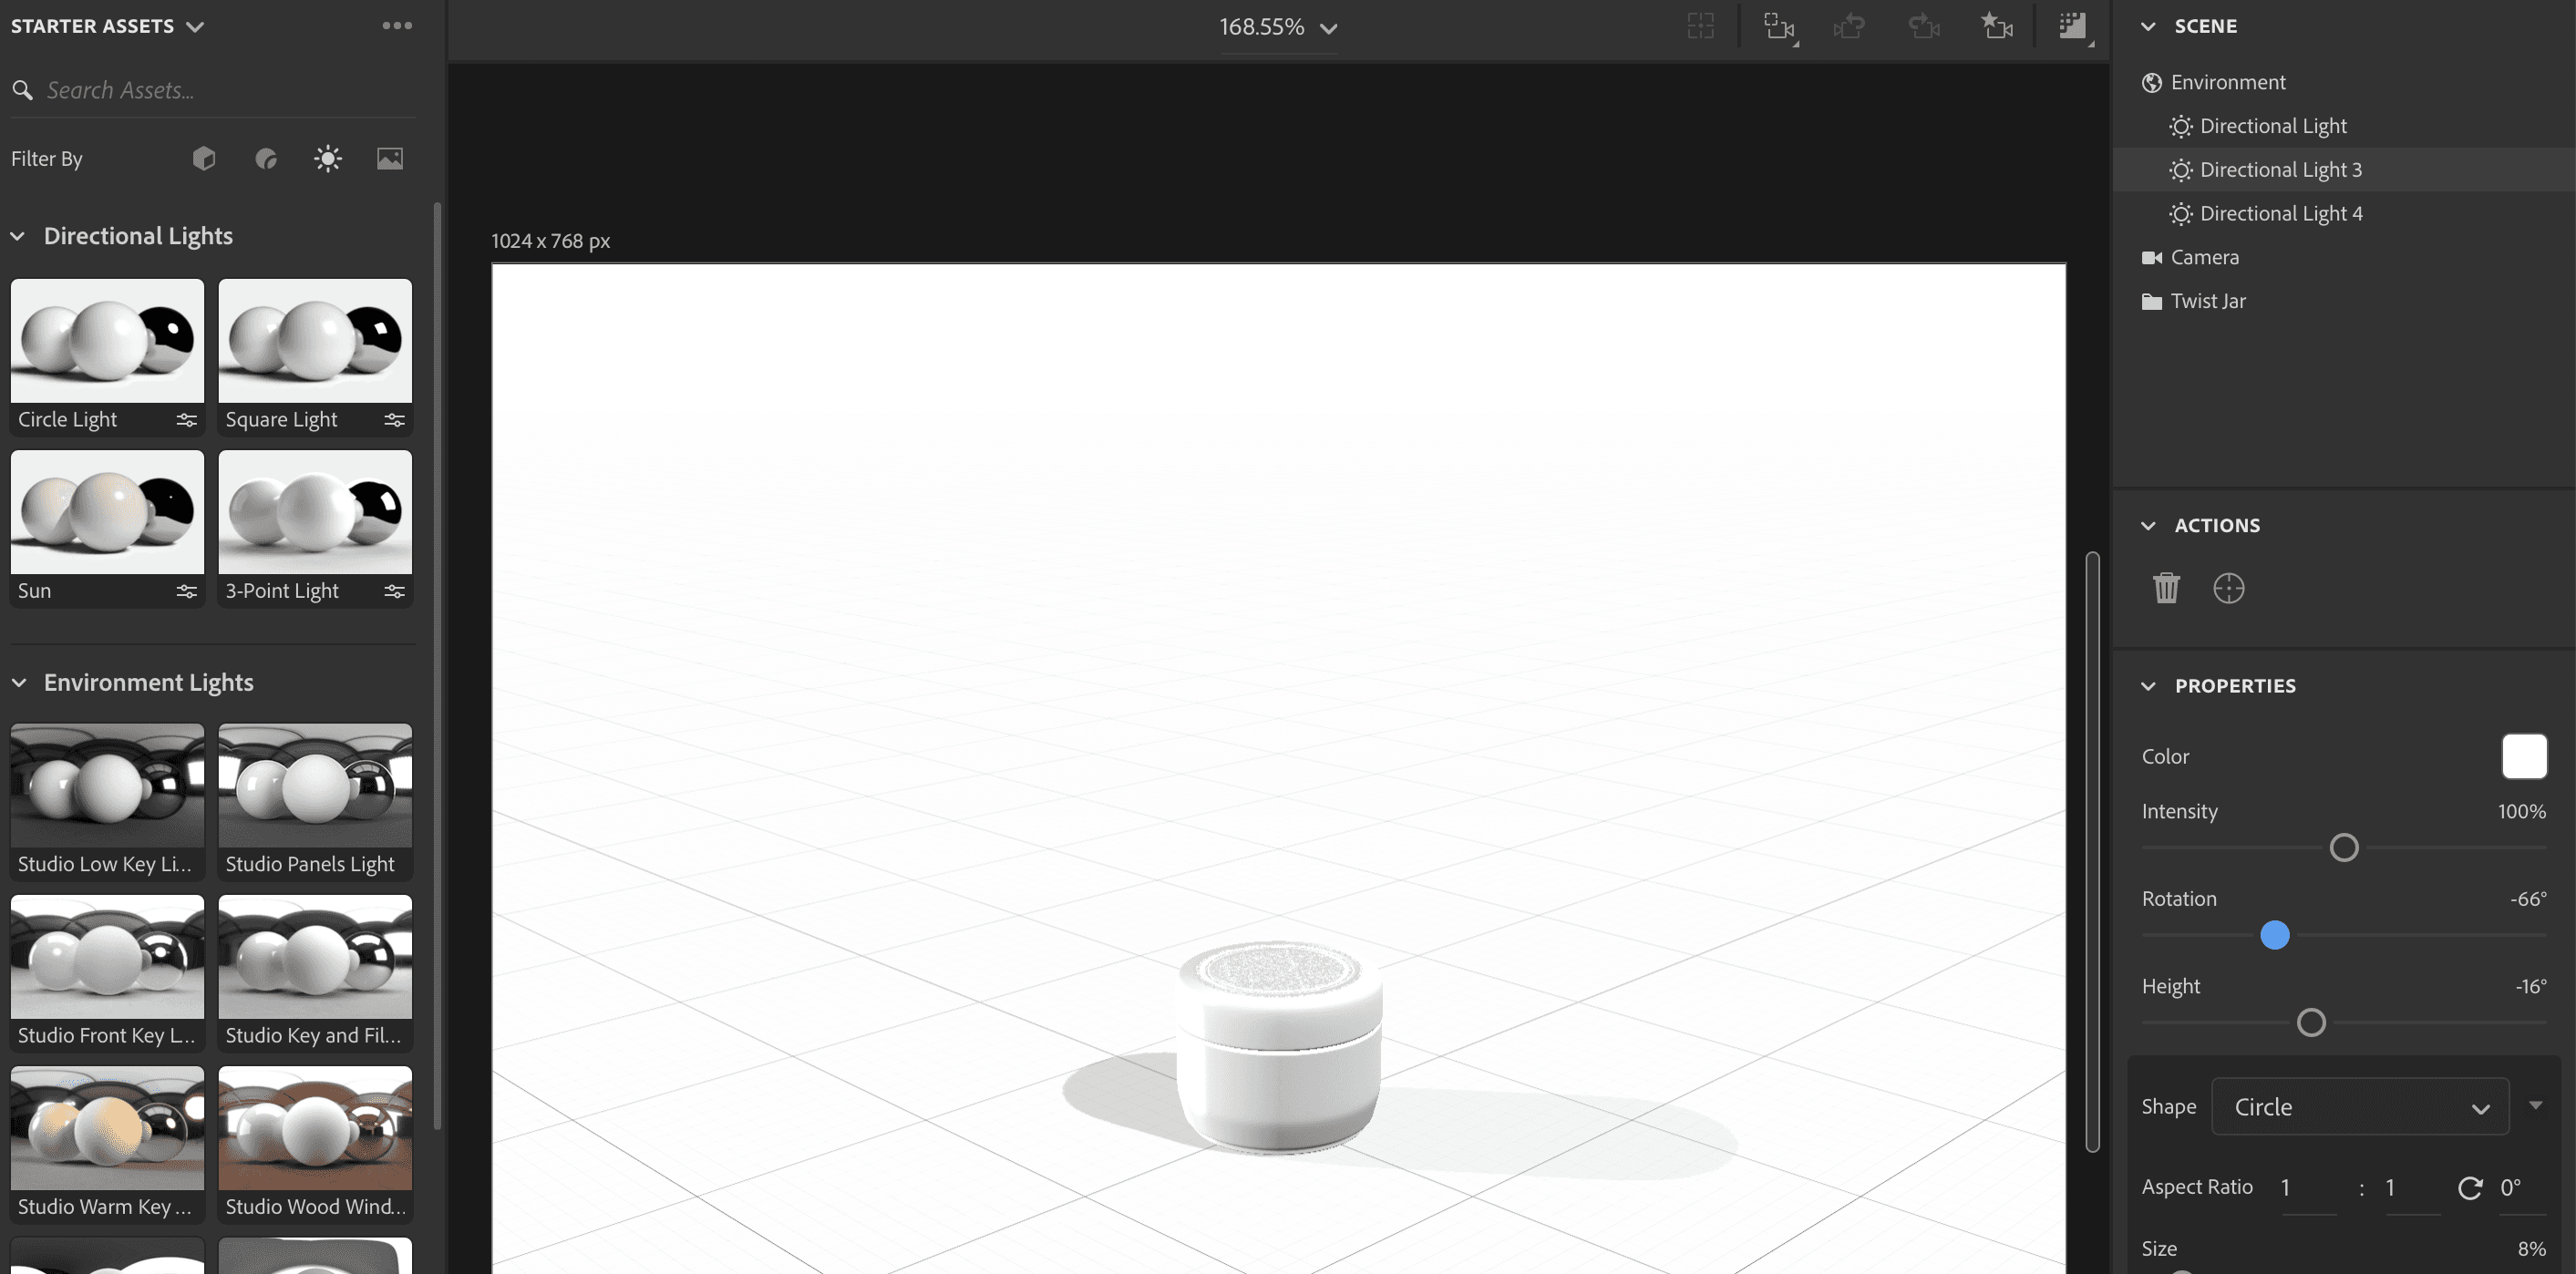
The Lights mode
The Lights mode consists of two main parts — the canvas on left and the properties panel on right.

How might we make it easier for users manipulate the position of light objects along the 3 dimensional axis?
Iteration 1
Axes labels
3D axes

Introduced 3D axes with XYZ labels on the canvas. This provided users with a clear visual reference for light positioning.

To ensure consistency, I also introduced XYZ labels within the position fields.
Iteration 2
Color-coded XYZ labels
Axes visuals on light object controls

Introduced axes visuals within light object controls, so the direction becomes prominent, providing immediate visual feedback.

Added colors to the XYZ labels within the position fields. These colors matched the corresponding axes on the canvas, enhancing visual clarity and helping users quickly identify directions.
Iteration 3
On-focus axes visuals
Axes visuals within input fields

Added a direction line that appears when a position value (X, Y, or Z) is in focus, offering a clear visual cue on the canvas.

Additionally, introduced axes within the input fields to further clarify and correlate directions.

Presets
—
3
How might we enable users to easily access and customize presets, ensuring a balance between control and exploration?
Vertical stacking
Dropdown
Progressive disclosure

All preset options are visible upfront
Informs users of the settings options within
Not ideal for a large number of presets

Reduces visual clutter by tucking away options
Could slow down the selection process

Users can choose to see settings only if needed
Users may miss out on the preset settings option altogether
Selected
Testing results favored option 3 — Progressive disclosure as users found it less overwhelming, and gave them the opportunity to try out presets without getting distracted by the settings options.
For the selected option, I explored to two flows —
Exploration path


Controlled path


Selected
Flow 2 was selected because it allowed users to try out presets first and then decide if they wanted to make any edits. This reduced the initial cognitive load and preventing them from being overwhelmed by too many settings options at once.

User flows
09
The journey from selecting a preset to the final save encapsulates a series of refined interactions designed to minimize guesswork and maximize user efficiency.

Users can view presets created by others, allowing them to try different lighting setups before deciding to edit if necessary. An edit icon appears on hover, taking the user to the light settings of the selected preset.

Users can show or hide individual lights, and hide all light controls from the canvas for an uninterrupted view. They can also interact with lights directly from the canvas, adjusting their positions and properties as needed.

Users can adjust intensity, temperature, and position properties of lights. They have the options to save changes to the current preset, create a new preset, revert to the last saved state, or reset all settings altogether.
Solution
10
The 'Lights' module was designed to provide teams and individuals with control over model lighting, encouraging exploration and creativity without adding the complexities of a traditional 3D tool.
Presets
Users can explore presets and make precise edits, fostering creativity without overwhelming complexity.
Versatile interactions
The module supports diverse interaction preferences by allowing users to interact with lights both directly on the canvas and through a detailed properties panel.

Preview
See before you save. This allows users to double-check changes, ensuring they're always confident in the end result.

Visual cues
Show/hide lights, rename them, and use color-coded cues for easy identification, ensuring users never feel lost.

Error recovery
Easily backtrack with reset and revert functions, and safely experiment with the 'save as new' option.

Impact
11
75% interest rate measured through client testing and feedback, indicating perceived value and usability.
33% experiement adoption rate that led to feature’s integration into the 3D viewer.
40% decrease in 'Environment' request tickets highlighting that the 'Lights' module successfully reduced dependency on 3D designers and enhanced productivity.
Lessons learned
12
This project taught me to be a more effective communicator, collaborator, and facilitator. I learned to embrace new challenges and focus on creating solutions that can grow with future needs.
Designing for the future. Although the project itself was small, it required consideration of future plans for the entire 3D viewer. It was crucial to design the module to be scalable and adaptable for future enhancements, minimizing the need for rework.
Commuincation was key. Collaboration with the engineering teams was essential to address potential edge cases and technical constraints, ensuring the project stayed on track. Regular communication and quick decision-making facilitated the project and vision at every stage.
Embracing new challenges. With very limited background in 3D tools, I immersed myself in understanding their complexities and how to simplify them for everyday users. This also involved gaining insight into the engineering side to understand how lights and environments are structured and what functionalities these objects can have.
Gathering Feedback. Access to end-clients was limited, so I had to find new ways to gather feedback. Collaborating with business consultants, sales teams, and 3D designers provided valuable insights and diverse perspectives.
Let's work together —
Currently looking for new opportunities